Reviving the TI-59
Welcome to the club
So you have a TI-59 (or TI-52, TI-58, TI-57) that still would work fine if only a new battery pack would be inserted? Welcome to the club. The bad news is, that the original replacement pack (BP-01) is not available anymore since ages. And even if you would get one, it's more than likely that the batteries perished already long ago.
The good news however is, that you don't need to be a rocket engineer to build your own pack. Even better, it is doable within 15 minutes. Ok, 20 minutes. Half an hour for the total dummies amongst you.
But the best of all - we can customize the pack so that the batteries stay exchangable. So when, in the very distant future, your new batteries finally cease to work, you just would stick a new set into the case and you're done.
What we need
Materials
- Metal strips. Use solder tails or something similar. No aluminum! You need a total length of around 6 cm / 2.5 in (2 strips with 2cm, 2 strips with 1cm length), the thickness is crucial and must not exceed 0.2mm!
If you can't find something suitable, take the contact strips of used 4.5V lantern batteries e.g. from supermarket battery deposits. The two strips from two batteries are sufficient
- 3 rechargable AA batteries. I took Duracell 2400mAh; there are precharged 2100mAh batteries available from Varta - a better choice if you can't wait 16 hours charging time. Otherwise charge the batteries before you start to have an instant feedback from your TI-59.
- a thin double-sided adhesive tape (e.g. double faced fotostrips) and any standard adhesive tape
- coffee
Tools
- a box cutter and scissors, or better tinner's snips when available (the scissors don't like to cut through metal, even when it is that thin)
Let's start
Remove the battery pack from your TI-59, check for corrosions on the contacts inside the calculator and clean them carefully if there are any.
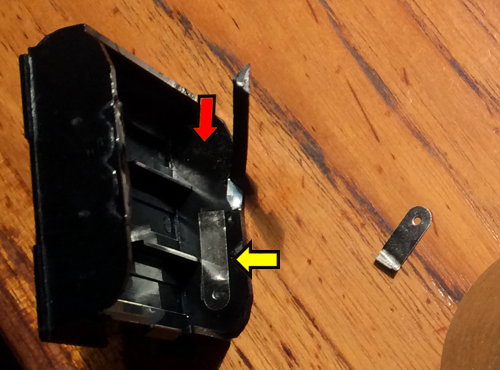
Now look at the BP-01:
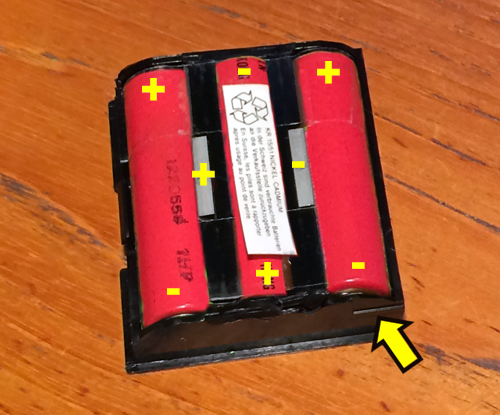
At one corner, you see a small notch (yellow arrow). This notch is important for the orientation and the polarity of the batteries! Use this picture as reference. The plus pole of the whole pack is at the side of the opening slit. You might want to engrave the location of the poles into the plastic case to be sure.
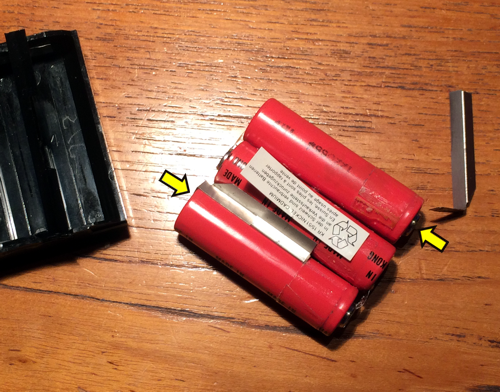
This is how the batteries are connected. The contacts are soldered to the batteries.
First step - opening the pack
To get the batteries out, there is no other way than removing the two plastic strips. Cut them off on one side and bend them up. If they break loose completely, it is not a big deal. But keep them and memorize their exact location. We will put them in place again and they will fit better when they are in the same position as before.
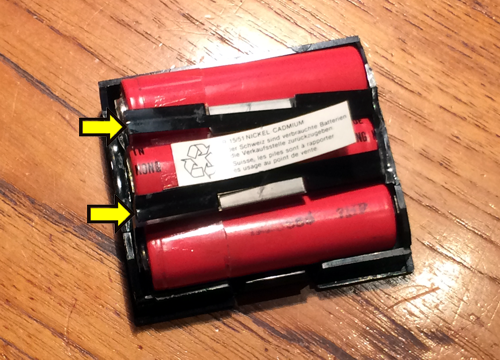
Second step - removing the contacts
Carefully cut off the two contacts with the box cutter. They are soldered to the batteries, so some force needs to be applied. However, don't break them because we will need them afterwards. This is the most critical step, so take your time. Put the blade between the contact and the battery, and stress the two soldered points by strong cutting and gently wobbling the blade. Take care of your fingers.
Third step - fixing the metal strips
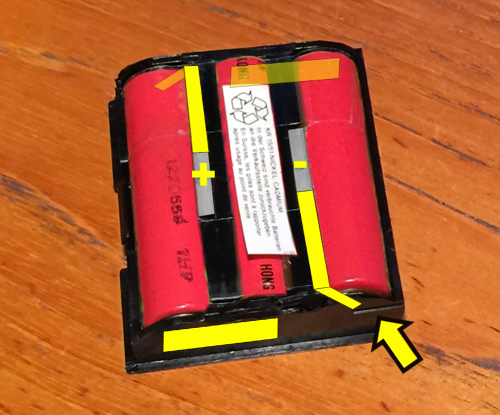
Now put the metal strips inside the case, cut them to the needed length and fix them with the double sided adhesive. Refer to picture 2 - the long strip must always be placed to the right side in your view (yellow arrow). The red arrow points to the edge with the notch.
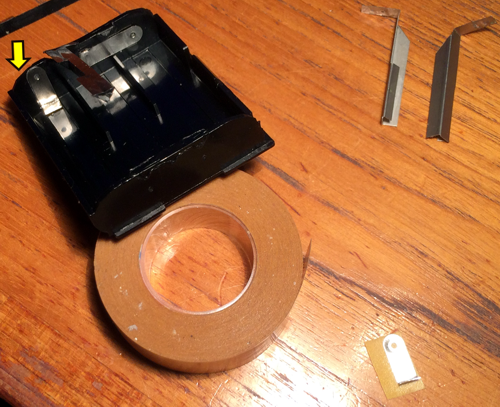
Here you see the finished side. The short strip stands vertical (bend the lower end to a right angle so it is stable) and should not exceed the height of the case. The yellow arrow points to the edge with the notch. Now rotate the case for 180° and do the same on the other side (long horizontal strip to the right, vertical strip to the left as depicted here). We are nearly done.
Forth step - closing the case
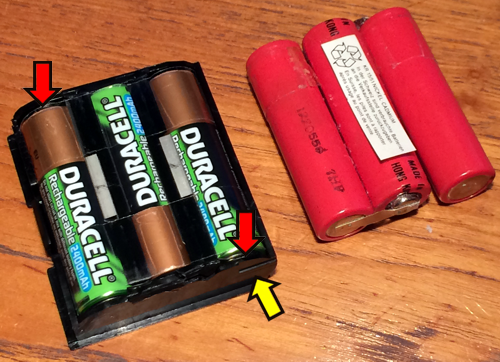
Place the batteries, take care of their orientation! Use the old pack as reference. The minus (flat) pole of the right battery is in the corner of the notch. The middle battery is upside down, the left battery has the same orientation as the right battery. Once the batteries are in place, stick the two contacts between metal strip and battery pole (red arrows) and rotate them inward so that they are placed between the batteries as before. You might want to test the pack either with a lantern light or a voltmeter to see if all batteries are properly connected. Then but the plastic strips back to their positions, and secure them with a tape. We are ready to go!
Final step - alive again
Put the battery pack into your TI-59. Breath deeply. The pack might fit very tight now. Don't apply too much force - if it does not fit, trim the sides carefully with the cutter and sand them a little bit. If they still don't fit, your metal strips are too thick. Remove the two vertical strips, as they only are intended as counterparts to the contacts, and try again. This should work.

And here we are. Your TI-59 is alive again, hopefully. Do the diagnostics as recommended in the books, and see if the card writer is funtional (mine works fine as ever). Have another coffee and enjoy ;)